 Pin it
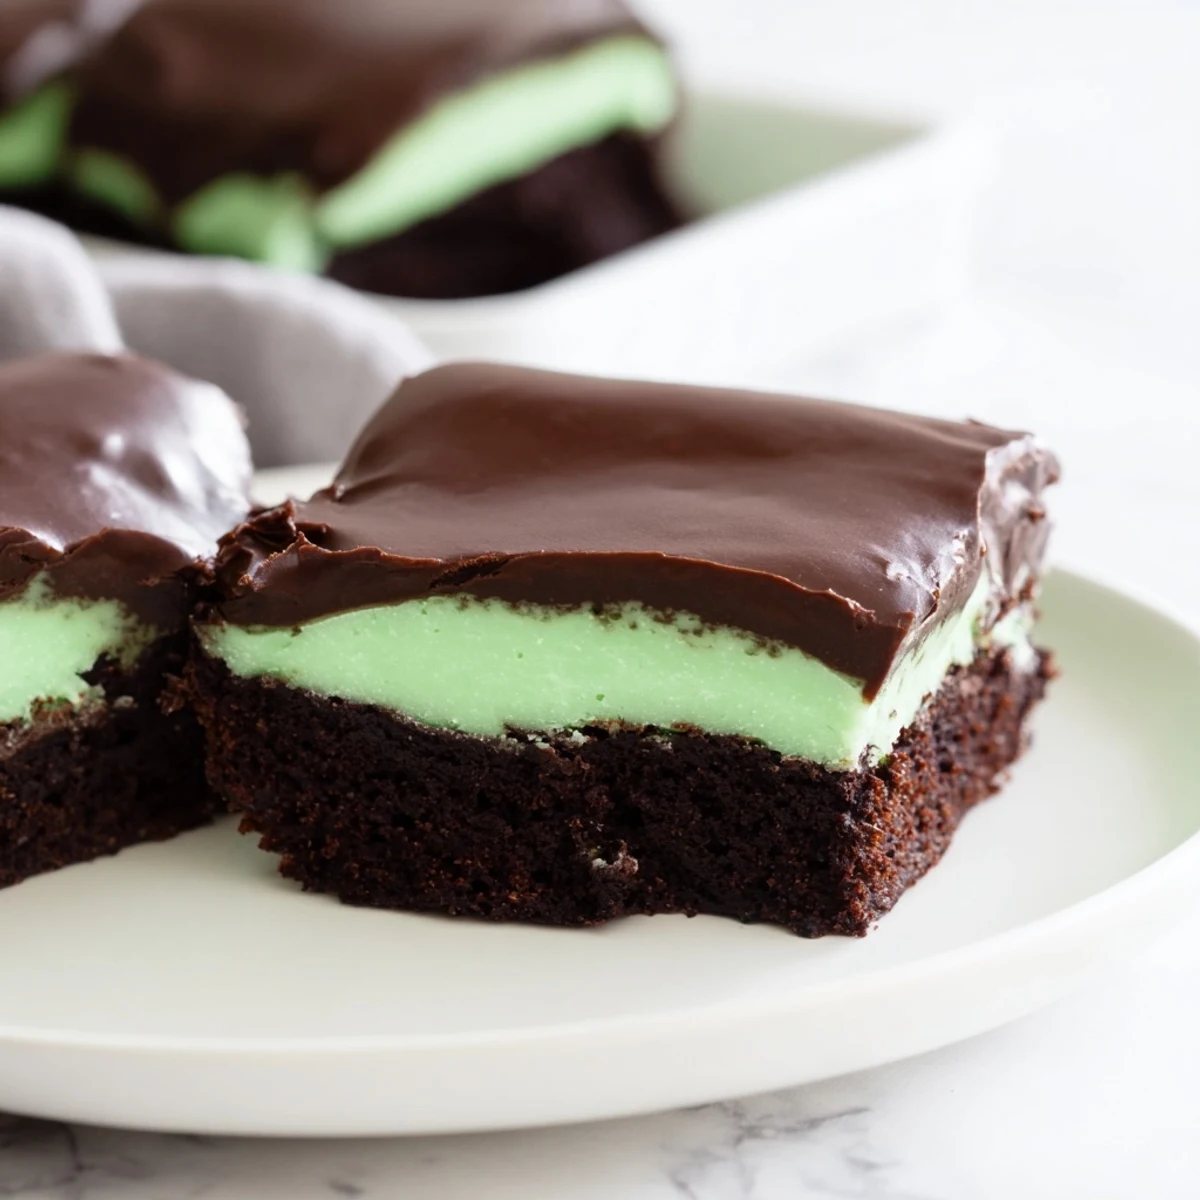
 These Shamrock Mint Brownies feature a rich, fudgy chocolate base that’s perfectly moist and dense. The brownies are enhanced by a creamy mint layer infused with peppermint extract and a hint of green for festive appeal. Finished with a smooth, glossy chocolate ganache, this dessert offers a harmonious blend of bold chocolate and refreshing mint flavors. Cooling in the fridge allows the layers to set beautifully, making neat squares easy to serve. Ideal for gatherings or satisfying any mint-chocolate craving with a touch of indulgence.
The kitchen smelled like pure chocolate bliss when I first attempted these mint brownies for a St. Patrick's Day party. I'd always been skeptical about mint and chocolate together—something about toothpaste memories—but one bite changed my entire perspective. Now they're the most requested dessert in my house, regardless of the season.
Last spring, my neighbor Sarah came over while I was spreading the ganache layer. She watched in silence as I poured that glossy chocolate over the bright green mint cream, then literally grabbed a fork before it even set. We stood at the counter eating messy, imperfect squares straight from the pan, laughing about how some desserts are worth breaking all the rules for.
Ingredients
- Unsalted butter: Use room temperature butter for the mint layer to achieve that silky smooth texture without overbeating
- Granulated sugar: This creates the crackly top on your brownies—dont reduce it or you will lose that signature bakery-style crust
- Large eggs: Room temperature eggs incorporate better and prevent the batter from seizing when you add them to the warm melted butter
- Unsweetened cocoa powder: Dutch-processed cocoa gives the deepest chocolate flavor and darkest color
- All-purpose flour: Sifting this prevents lumps and ensures your brownies are uniformly tender without tough spots
- Peppermint extract: Start with half teaspoon and taste—this stuff is potent and you can always add more but you cannot take it back
- Semisweet chocolate: Chop this yourself instead of using chips because chips have stabilizers that keep them from melting into perfectly smooth ganache
Instructions
- Prep your pan like a pro:
- Line that 8-inch pan with parchment paper, letting the edges hang over two sides—this is your brownie removal system and you will thank yourself later
- Mix the brownie batter:
- Whisk your melted butter and sugar until they are friends, then beat in eggs and vanilla until everything looks glossy and smooth
- Combine dry ingredients:
- Sift cocoa, flour, salt, and baking powder right into your wet ingredients and fold until just combined—some streaks are better than overmixed tough brownies
- Bake to perfection:
- Pour and smooth the batter, then bake 25–30 minutes until a toothpick comes out with moist crumbs, not raw batter
- Make the magic mint layer:
- Beat softened butter until creamy, then gradually add powdered sugar, milk, and peppermint extract until it is silky smooth
- Chill for structure:
- Spread that green goodness evenly over your cooled brownies and refrigerate 30 minutes so the ganache does not mix into the mint
- Create the ganache:
- Heat heavy cream until it is just about to bubble, pour over chopped chocolate, wait 2 minutes, then whisk until it is glossy and smooth
- Final assembly:
- Spread ganache over your chilled mint layer and refrigerate another 30 minutes until set—then lift and slice into perfect squares
 Pin it
 These became my go-to birthday dessert after my daughter requested them instead of cake three years in a row. Something about that combination of flavors makes people feel special, like you put extra thought into making something extraordinary instead of just ordinary brownies.
Getting That Perfect Green Color
I have learned the hard way that green food coloring can go from festive to alarming in one drop. Start with a tiny amount, mix thoroughly, and add more gradually. Gel coloring works better than liquid because it does not throw off your consistency, and remember—pastel green looks more sophisticated than shamrock green.
Making These Ahead
The beauty of these brownies is they actually improve after a day in the refrigerator. The layers meld together and the flavors deepen, making them perfect for making the day before a party. Cover them tightly once the ganache is completely set and they will wait patiently for you until serving time.
Serving And Storing
Cut these with a sharp knife wiped clean between slices for the cleanest edges, and let them sit at room temperature 10 minutes before serving so the ganache softens slightly. Room temperature brownies taste more chocolatey than cold ones straight from the fridge.
- Use a plastic knife or run your knife under hot water between cuts for perfectly smooth slices
- These freeze beautifully for up to 2 months—wrap individual squares in plastic then foil
- Store in the refrigerator but always bring to room temperature before serving for the best texture
 Pin it
 Whether it is St. Patrick's Day or just a Tuesday, these mint brownies turn ordinary moments into something worth celebrating. Enjoy every fudgy, minty, chocolatey bite.
Recipe Q&A
- → How can I achieve the fudgy texture in the brownies?
-
Using melted butter and precise baking time helps keep the brownies moist and dense. Avoid overmixing the batter to retain a tender crumb.
- → What gives the mint layer its fresh flavor?
-
Freshness comes from peppermint extract combined with butter and powdered sugar, creating a smooth, creamy mint topping.
- → Can I use a different chocolate for the ganache?
-
Yes, semisweet or bittersweet chocolate works best for balance, but milk chocolate can add more sweetness. Adjust cream accordingly for texture.
- → How long should the brownies chill before cutting?
-
Chilling the layered brownies for at least one hour helps set the mint cream and ganache, making clean cuts easier.
- → Is there a way to add a decorative touch to the top?
-
Using a shamrock-shaped stencil dusted with cocoa powder or edible glitter adds a festive, elegant finish.
