 Pin it
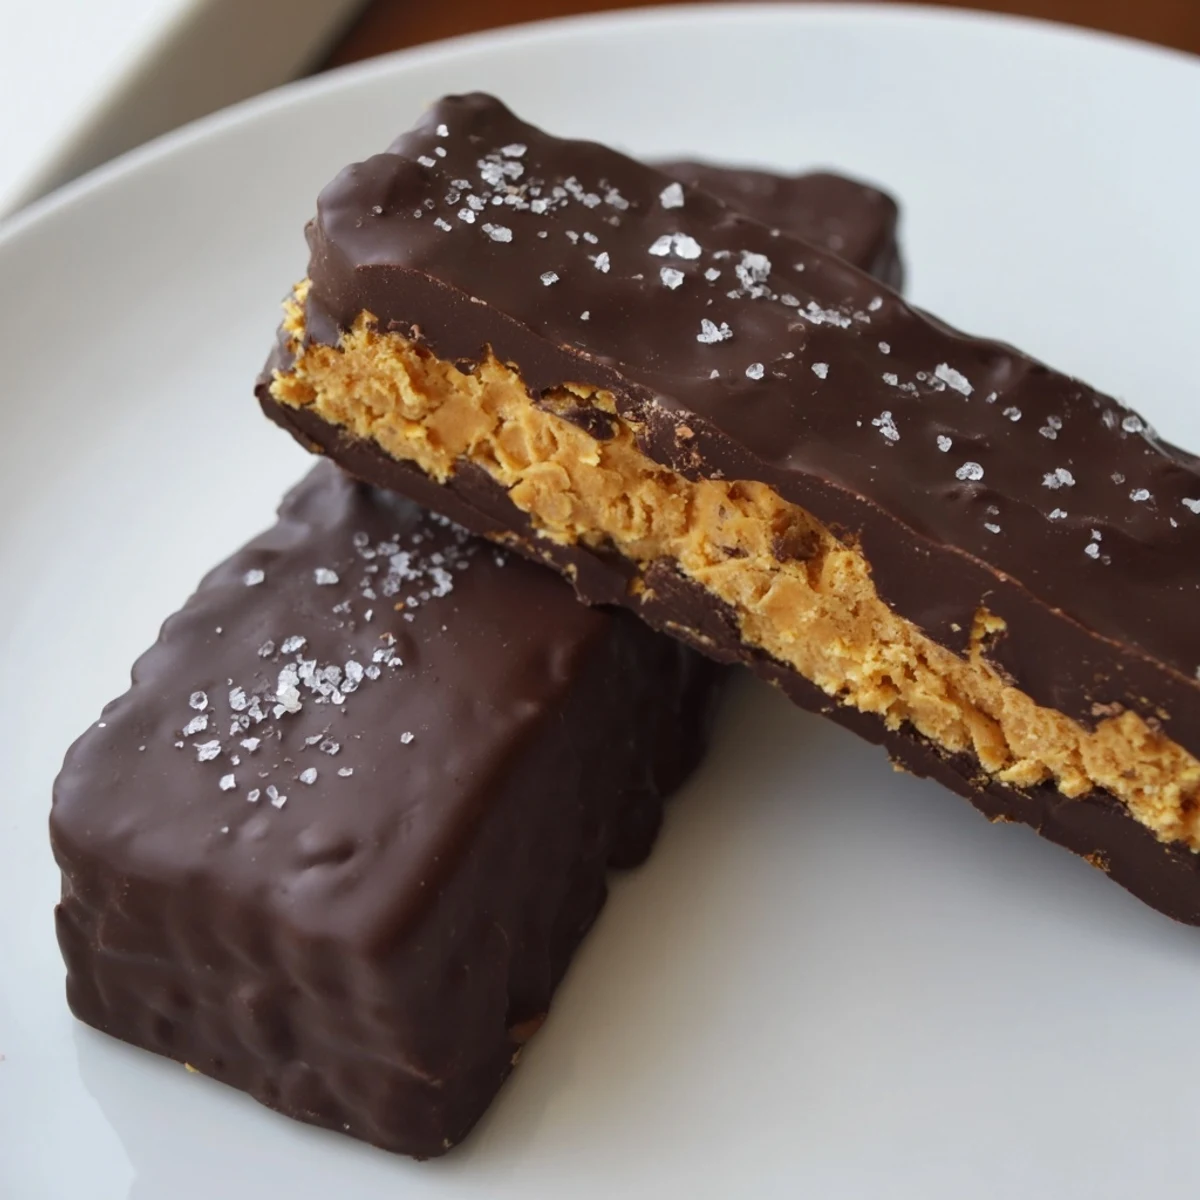
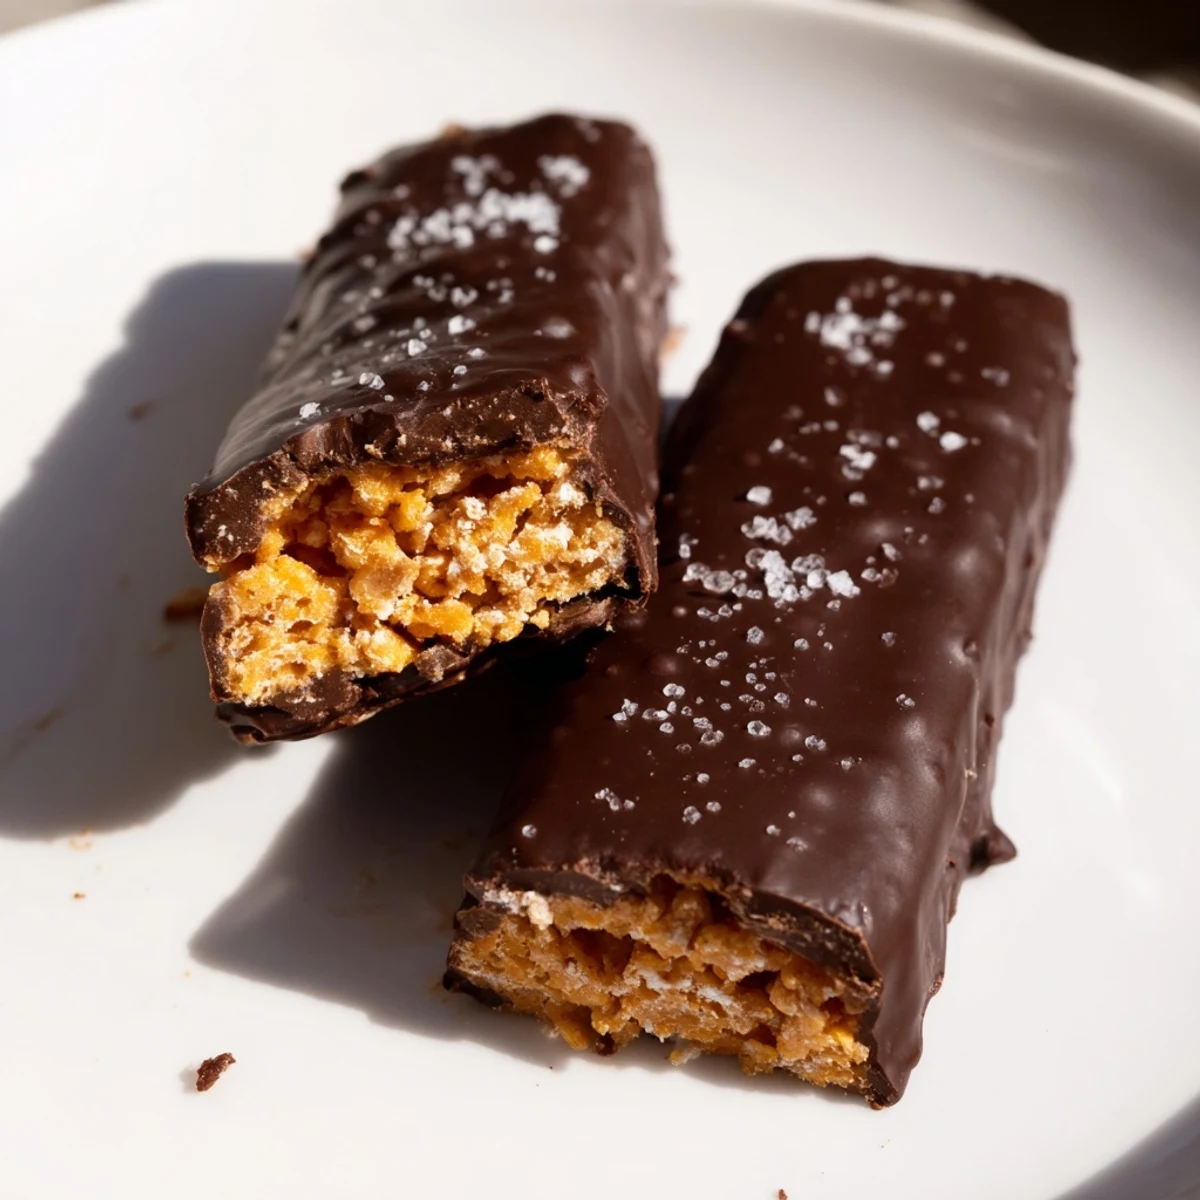
 These healthy homemade Butterfingers capture everything you love about the classic candy bar — the signature crunchy peanut butter center and glossy chocolate coating — without the heaviness of the original.
A simple mixture of creamy peanut butter, maple syrup, and crushed cornflakes forms the crisp filling. After a quick chill to set, each bar gets dipped in melted dark chocolate and finishes in the fridge until perfectly set.
Ready in about an hour with only 10 minutes of active cooking, these bars are vegetarian, easily made vegan and gluten-free, and store well in the fridge or freezer for whenever a sweet craving hits.
The candy aisle at the grocery store always gets me. Those bright orange Butterfinger packages sit there looking all innocent, and before I know it, three of them have mysteriously landed in my cart. One particularly rainy Tuesday, after catching myself mid-reach yet again, I decided it was time to figure out how to make something similar at home with ingredients I could actually pronounce.
I brought a batch of these to a movie night with friends, fully expecting them to sit untouched next to the store-bought snacks. They disappeared before the opening credits finished rolling, and my friend Derek actually paused the movie to ask if I was secretly buying fancy artisan candy and pretending I made it.
Ingredients
- Natural creamy peanut butter: The natural kind without added sugars lets you control the sweetness, and its runnier texture helps coat the cornflakes evenly.
- Pure maple syrup or honey: This binds everything together while adding a gentle caramel-like sweetness that pairs beautifully with the peanut butter.
- Vanilla extract: Just a teaspoon rounds out the flavors and makes the whole thing taste more like a treat than a health project.
- Cornflakes: Lightly crushed is the key here, as you want small pieces that still hold their shape for that signature Butterfinger flakiness.
- Sea salt: A small pinch makes the peanut butter sing and balances the sweetness perfectly.
- Dark chocolate chips: Go for good quality chocolate since it is the first thing you taste, and the slight bitterness contrasts wonderfully with the sweet filling.
- Coconut oil: This thins the chocolate just enough for easy dipping and gives you that satisfying snap when you bite into a cold bar.
Instructions
- Prep your pan:
- Line an 8x8 inch baking dish with parchment paper, leaving some overhang on the sides so you can lift the whole slab out later without a struggle.
- Warm the peanut butter mixture:
- Combine peanut butter and maple syrup in a saucepan over medium-low heat, stirring gently until everything melts together into a silky golden pool that smells absolutely incredible.
- Fold in the crunch:
- Remove the pan from the heat, stir in vanilla and salt, then gently fold in the crushed cornflakes until every flake is coated in that luscious peanut butter mixture.
- Press and freeze:
- Spread the mixture into your prepared pan and press it down firmly and evenly with a spatula, then tuck it into the freezer for about twenty five minutes until it holds its shape.
- Cut into bars:
- Lift the slab out using the parchment overhang and slice it into sixteen bars with a sharp knife, pressing straight down rather than sawing for the cleanest edges.
- Melt the chocolate:
- Combine chocolate chips and coconut oil in a microwave-safe bowl and heat in thirty second bursts, stirring between each, until you have a glossy, smooth coating.
- Dip and chill:
- Drop each bar into the chocolate, flip to coat all sides, and lift it out with a fork, letting excess drip off before placing on parchment to set in the fridge for about twenty minutes.
 Pin it
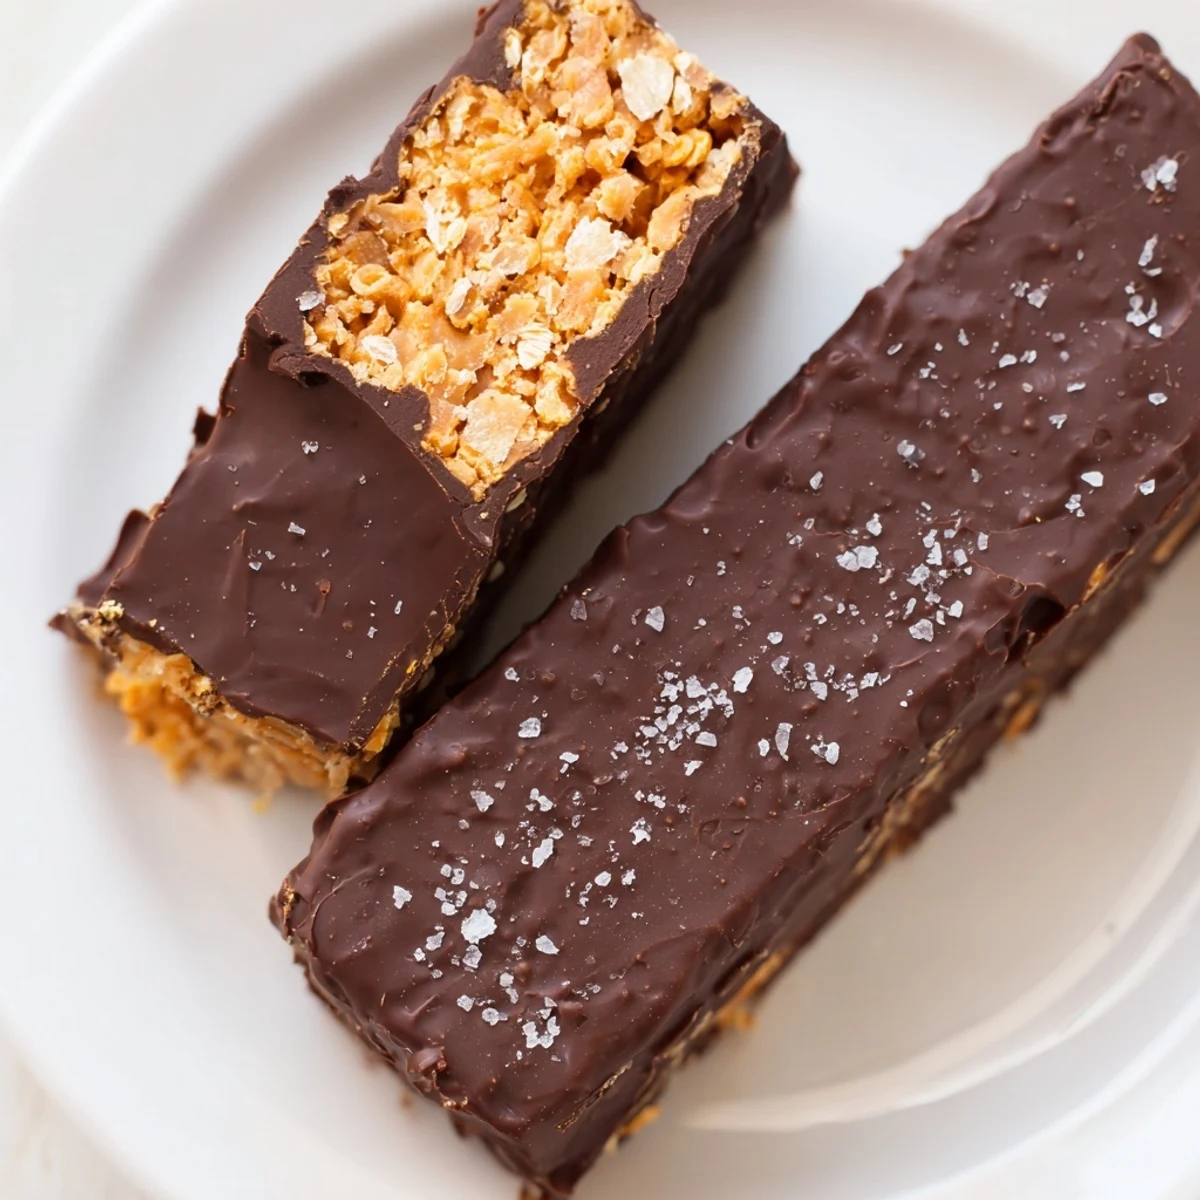
 There is something deeply satisfying about biting into a homemade candy bar that snaps just right, with flakes of peanut butter crunch falling onto the plate the way the real thing does. It transforms a simple weeknight into a small celebration.
Storing Your Candy Bars
Keep these bars in an airtight container in the refrigerator and they will stay delicious for about two weeks, though honestly they never last that long in my kitchen. If you want to stash some for a rainy day, layer them between sheets of parchment in a freezer-safe container and they will keep for up to three months.
Swaps and Variations
For a fully vegan version, stick with maple syrup instead of honey and choose dairy-free chocolate chips, which are easier to find than ever now. You can swap milk chocolate for the dark if you prefer a sweeter coating, and a final sprinkle of flaky sea salt on top before the chocolate sets takes these into genuinely fancy territory.
Tools That Make This Easier
A good saucepan with a heavy bottom heats the peanut butter mixture evenly without hot spots that could scorch it. Beyond that, keep your setup simple and your cleanup minimal.
- A flat spatula with a straight edge presses the mixture into the pan more evenly than a curved one.
- A fork is the best tool for dipping bars into chocolate because it lets excess drip through the tines.
- Parchment paper on your dipping tray means the chocolate will not stick once it sets.
 Pin it
 Homemade candy bars feel like a small act of rebellion against the vending machine, and these ones earn their spot in your refrigerator with every crunchy, chocolatey bite. Share them generously or hide them behind the leftovers, because either way they will disappear fast.
Recipe Q&A
- → Can I make these Butterfingers vegan?
-
Yes. Use maple syrup instead of honey and choose dairy-free dark chocolate chips. Coconut oil remains the same. Always verify your cornflakes are free of animal-derived ingredients.
- → Why are my bars falling apart when dipping?
-
The peanut butter mixture needs sufficient freezing time — at least 20 to 30 minutes — before cutting and dipping. If the bars soften while working, return them to the freezer for a few minutes between batches.
- → What can I substitute for cornflakes?
-
Rice Krispies or crushed gluten-free cereal flakes work well as alternatives. Avoid heavily sweetened cereals, as the maple syrup and chocolate already provide plenty of sweetness.
- → How should I store leftover bars?
-
Keep them in an airtight container in the refrigerator for up to two weeks. For longer storage, freeze them for up to three months. Let frozen bars thaw in the fridge before serving.
- → Can I use milk chocolate instead of dark?
-
Absolutely. Milk chocolate melts and coats just as well. Keep in mind it will be sweeter and slightly softer when set compared to dark chocolate.
- → Do I need to crush the cornflakes finely?
-
Lightly crushed is ideal — you want small pieces that still hold some texture. Over-crushing into powder will lose the signature crunch that makes these bars recognizable.
