 Pin it
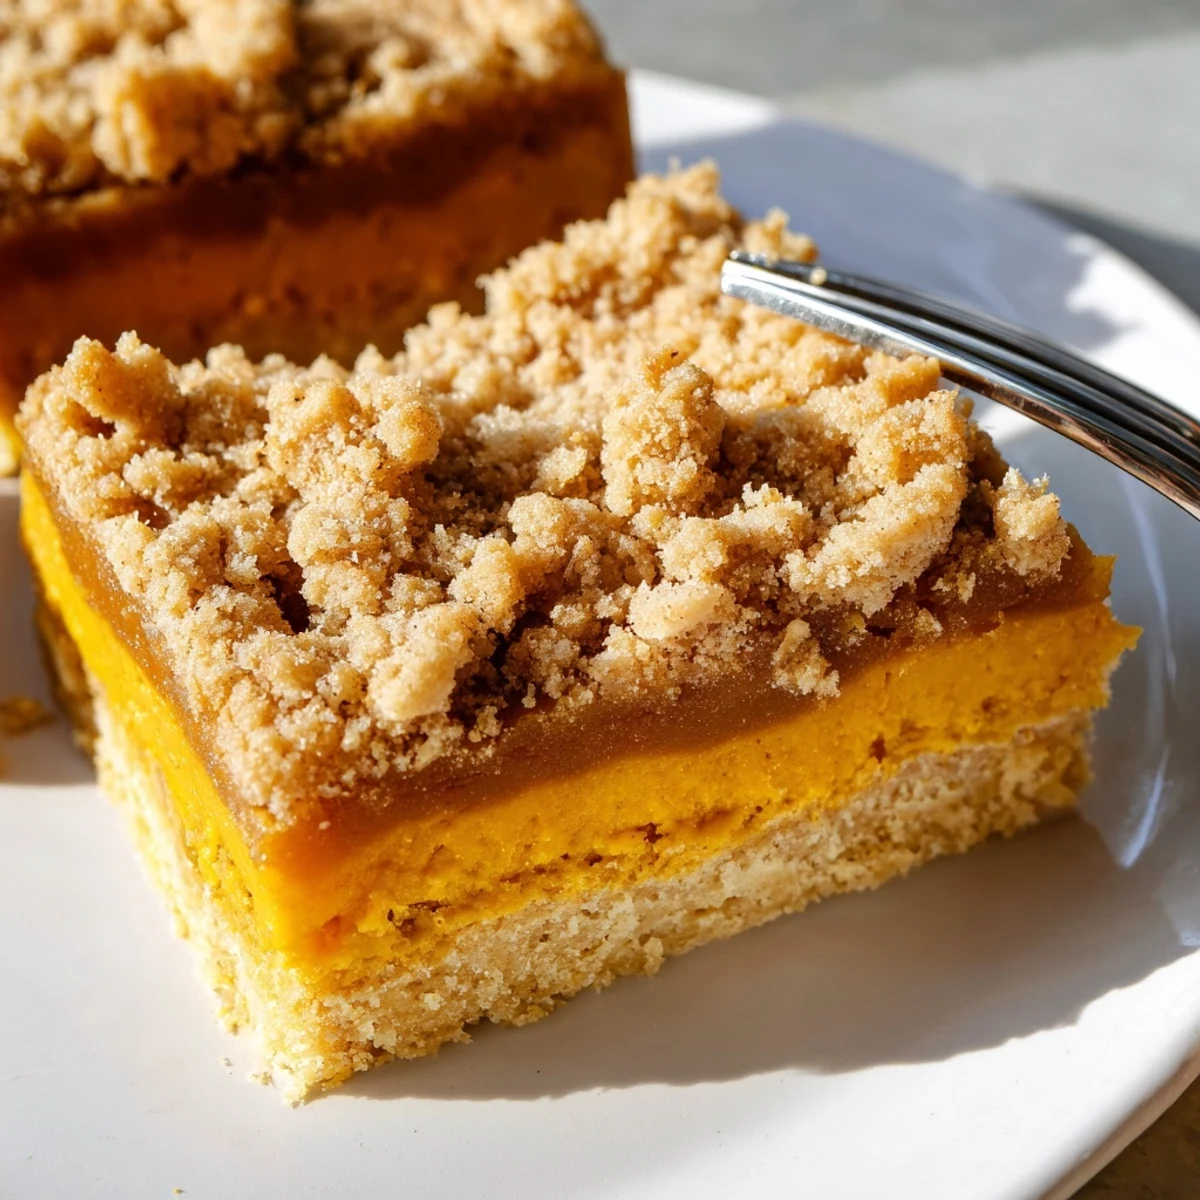
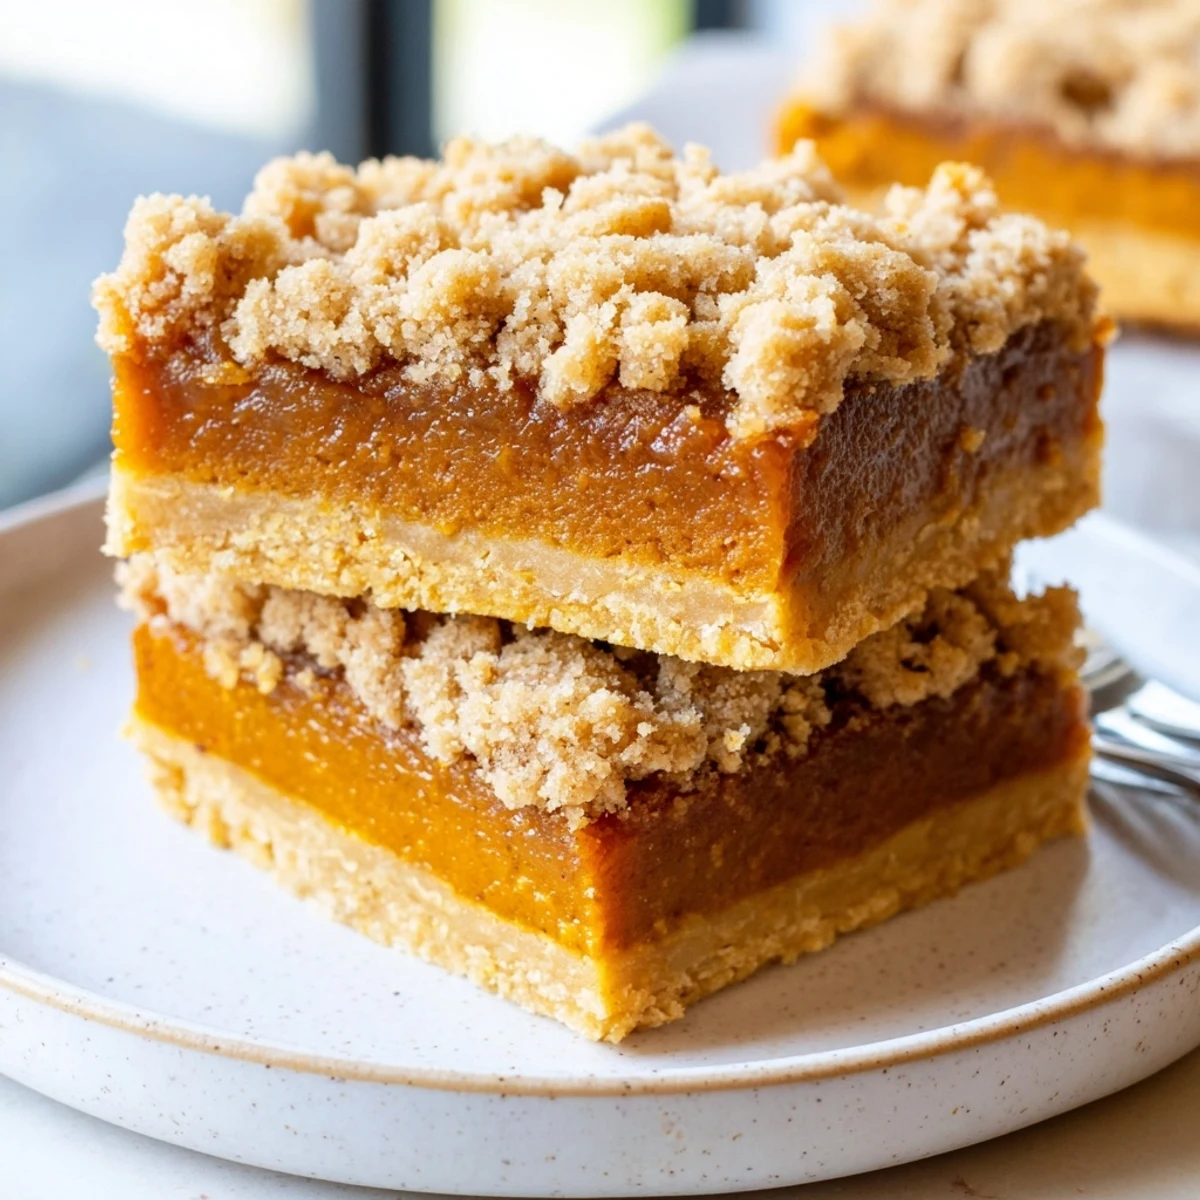
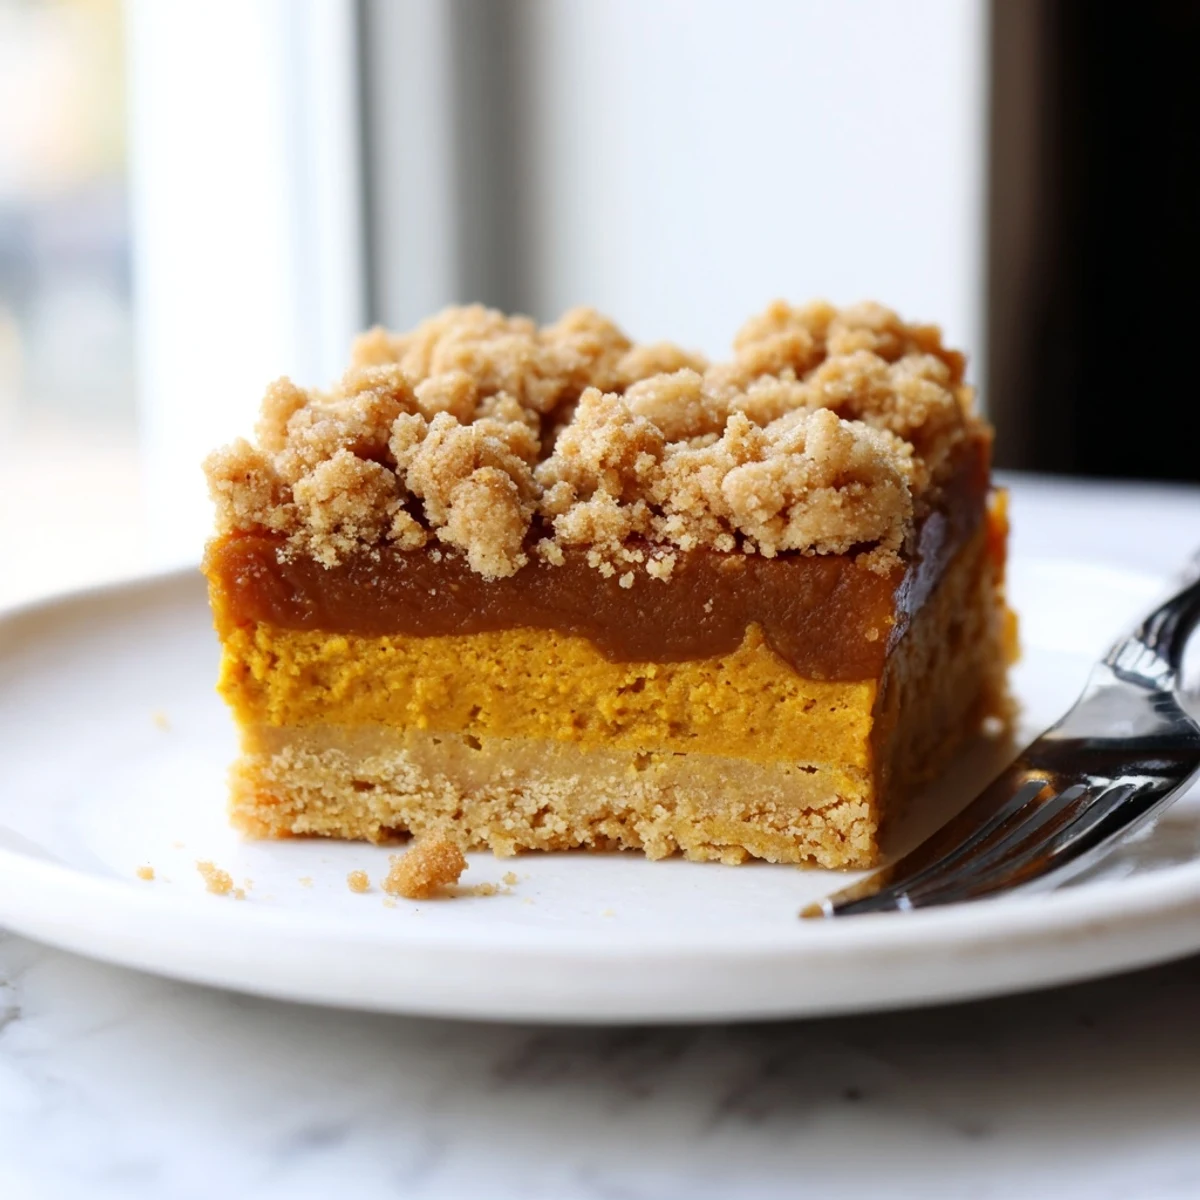
 These indulgent bars combine three layers of pure autumn comfort. Start with a pressed buttery shortbread crust, add a smooth pumpkin filling sweetened with pure maple syrup and warm pumpkin pie spice, then finish with a crumbly brown sugar cinnamon streusel. The result is a perfectly balanced dessert that's not overly sweet but deeply satisfying.
The texture contrasts beautifully—crisp bottom, creamy center, and crunchy topping. Ready in just over an hour with simple pantry ingredients, these bars are ideal for fall entertaining, holiday platters, or as a special treat alongside your morning coffee or afternoon tea.
My kitchen smelled like autumn took up residence and refused to leave the first time I made these bars on a rainy Sunday afternoon. I had half a can of pumpkin purée sitting in my fridge from a failed baking experiment earlier that week, and something about the gloomy weather demanded I turn it into something worth eating before it went to waste.
I brought a batch to my book club last November, and before I could even set the plate down properly, three people had already asked for the recipe. There is something about the combination of maple and pumpkin that makes people lean in closer, maybe because it tastes like the kind of comfort food your grandmother might have made if she had access to really good maple syrup.
Ingredients
- All-purpose flour: This builds the foundation for both crust and streusel, and I learned the hard way that packing your flour into the measuring cup creates heavy bars instead of tender ones
- Brown sugar: The molasses in brown sugar adds depth that white sugar cannot achieve, and packing it firmly means your streusel will create those irresistible crispy nuggets everyone fights over
- Cold butter: Keeping your butter ice cold for the crust creates those flaky layers, and I keep mine in the freezer for ten minutes before starting
- Pumpkin purée: Make sure you are using pure pumpkin purée rather than pumpkin pie filling, which already contains spices that will throw off your measurements
- Maple syrup: Pure maple syrup makes all the difference here, and the darker grade gives you more of that signature maple flavor
- Pumpkin pie spice: This shortcut blend saves you from measuring five different spices, though I always add a little extra cinnamon because that is just how I operate
- Eggs: Room temperature eggs incorporate more smoothly into your filling, so set them out about twenty minutes before you start baking
Instructions
- Get your oven ready:
- Preheat your oven to 350°F and line an 8x8-inch baking pan with parchment paper, letting the paper hang over the edges like handles that will save your life when it comes time to remove the bars later.
- Build the base:
- Combine flour, brown sugar, and salt in a bowl, then cut in that cold cubed butter until the mixture looks like wet sand with some pea-sized chunks remaining. Press this firmly into the bottom of your prepared pan, using the bottom of a measuring cup to create an even layer that will bake up sturdy enough to support everything above it.
- Par-bake the foundation:
- Bake the crust for exactly ten minutes, which sets the structure and prevents that soggy bottom situation nobody wants in their dessert bars.
- Whisk up the magic:
- In a separate bowl, whisk together pumpkin purée, maple syrup, brown sugar, eggs, pumpkin pie spice, vanilla, and salt until completely smooth. You want this filling to look like glossy velvet, with no streaks of egg or pockets of unmixed spice remaining.
- Layer it on:
- Pour the pumpkin filling over your pre-baked crust and spread it evenly with an offset spatula or the back of a spoon, taking care not to disturb the crust underneath.
- Create the crown:
- Mix flour, brown sugar, cinnamon, salt, and melted butter until crumbly, then sprinkle this streusel evenly across the pumpkin layer. Do not press it down because those loose, sandy bits are exactly what creates that satisfying crunch on top.
- Bake to perfection:
- Bake for thirty minutes until the center is set with just a slight wobble when you gently shake the pan, and the streusel has turned a golden brown that makes your kitchen smell like the best bakery in town.
- Patience pays off:
- Cool completely in the pan before attempting to cut, because warm pumpkin filling creates messy slices that slide apart instead of holding their shape like you want them to.
 Pin it
 My neighbor texted me at 10 PM the night I first made these, asking what smelled so incredible because it was wafting through our shared wall. I brought over a plate still warm from the oven, and we ended up sitting at her kitchen table eating them straight from the pan and talking about everything and nothing until the rain stopped.
Making These Ahead
You can prepare the entire recipe up to two days in advance, storing them in the refrigerator wrapped tightly in plastic. The flavors actually meld and improve after a day, making these an ideal choice for Thanksgiving when you need to get ahead of the game and avoid last-minute kitchen chaos.
Serving Suggestions
These bars hold their own without any accompaniment, but a dollop of lightly sweetened whipped cream or a scoop of vanilla ice cream transforms them into something dessert-restaurant worthy. I have also served them alongside a steaming mug of chai for an afternoon snack that feels indulgent without being over the top.
Storage and Freezing
Keep these bars refrigerated for up to five days, layered between parchment paper in an airtight container. They freeze beautifully for up to three months, and I always keep a stash wrapped individually in foil for those emergency dessert situations that seem to arise whenever company drops by unexpectedly.
- Thaw frozen bars on the counter for about an hour before serving
- The streusel loses some of its crispness after freezing but the flavor remains unchanged
- These reheat beautifully in the microwave for twenty seconds if you prefer them warm
 Pin it
 Every autumn, these have become as much of a tradition in my house as changing out my wardrobe and pulling out the chunky sweaters. Some recipes you make once, but these pumpkin butter bars have earned a permanent spot in my regular rotation.
Recipe Q&A
- → Can I use fresh pumpkin instead of canned puree?
-
Yes, you can use fresh pumpkin puree. Roast or boil a small pie pumpkin until tender, then puree until smooth. Drain excess liquid by letting it sit in a cheesecloth for 30 minutes before using.
- → How do I know when the bars are done baking?
-
The bars are finished when the center no longer jiggles when gently shaken and the streusel topping is golden brown. A toothpick inserted in the center should come out mostly clean with moist crumbs.
- → Can I make these ahead of time?
-
Absolutely. These bars actually taste better the next day as flavors meld. Store in an airtight container in the refrigerator for up to 5 days. Bring to room temperature before serving for best texture.
- → What's the best way to cut clean bars?
-
Cool completely at room temperature, then refrigerate for at least 2 hours. Use a sharp knife wiped clean between cuts. For extra precision, warm the knife under hot water and dry between slices.
- → Can I freeze these pumpkin bars?
-
Yes, freeze individually wrapped bars or layers separated by parchment paper for up to 3 months. Thaw overnight in the refrigerator and bring to room temperature before serving.
- → What can I substitute for maple syrup?
-
Honey works as a direct substitute for maple syrup, though the flavor profile will change slightly. For a maple-free version, you can also use an equal amount of dark corn syrup or brown rice syrup.
